- From the Setup menu, select Change Setup (PhotoPRINT SE) or Add Setup (PhotoPRINT Server / FlexiPRINT Server).

- Select the type of device you want to set up.
Vinyl cutters are only supported as part of a "virtual hybrid." See Contour Cutting and Virtual Hybrid Output for more information.
- Select the brand name and model name of the output device from the lists and click Next.

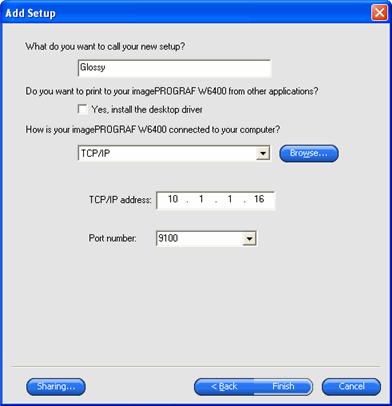
- Edit the setup name. This name also acts as the default hot folder name.
- Check Yes, Install the desktop driver to make the device available as a standard printer to other programs on your computer.
To print to this device from a different Windows PC or a Macintosh running OS X, you must install a desktop driver for the printer.
- Select the type of port the output device uses for communication. If necessary, edit the communications settings for the chosen port. See Editing Setup Properties for more information.
If TCP/IP is available for the network output device, use TCP/IP. If not, you should choose LPR.
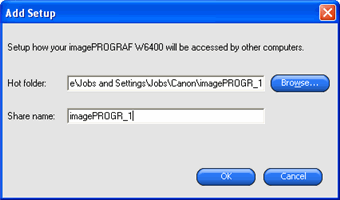
- If you want to share the device over a network, click the Sharing button.

- Click Browse to change the location of the hot folder that the software will use to store the job files for this device.
- Edit the Share Name.
- Click OK.
Sharing is not available in PhotoPRINT SE.
- Click Finish.


